行动前的考虑
◆原有的React Native工程是在Windows下安装完Android开发环境后使用命令"react-native init"生成的,看到存储Android SDK所需的30G+的硬盘和Android模拟器运行所需的8G+内存预算,想在自己的便携机上搞一套相同环境负担实在太重;
◆看到Expo时被其简练的开发流程所吸引,而环境轻量太多了,也同样支持代码修改保存后自动刷新内容。设想利于Expo能随时随地用便携机开发APP,到构建发布时候再使用笨重的Android环境,很美好;
◆React Native中文官网警告Expo大量依赖于国外网络环境,只用于学习、演示、试验等,不建议国内使用。我的目的就是用于开发过程方便看效果,实践后发现仅仅在安装Expo环境和创建工程的时候才需要国外网络环境;
尝试基础的React Native项目
步骤总结如下:
◆安装Expo环境,使用“react-native init”命令创建个新的React Native工程;
◆进入React Native工程目录下创建可运行的Expo的工程:expo init demo ;
◆进入demo目录,为“app.json”文件增加如下packagerOpts配置内容,以指定使用自定义的metro配置文件;
1 | { |
◆新建“metro.config.js”文件,内容如下。其中的blacklistRE配置了一个正则,打包时会忽略掉正则匹配到的路径。因为在根目录下的node_modules中会存在与demo目录下node_modules中相同的库,例如react-native, react, prop-types,如果不忽略就会使得providesModule在解析时产生重名,从而导致jest-haste-map报错。
1 | const path = require('path'); |
◆安装“metro.config.js”文件中用到的escape-regex-string,执行:yarn add escape-regex-string ;
◆修改App.js将原React Native的App作为组件引入,如下:
1 | import App from '../App'; |
◆回到上一级的React Native工程目录,修改"metro.config.js"文件,内容如下,目的是忽略demo文件夹下的node_modules中的库;
1 | const path = require('path'); |
◆安装“metro.config.js”文件中用到的escape-regex-string,执行:yarn add escape-regex-string ;
◆以上即创建了支持Expo的最基础React Native项目的开发环境,直观上的修改是:
(1)增加了demo文件夹;
(2)增加了escape-regex-string的依赖;
(3)metro配置中增加了忽略文件夹;
◆项目需要安装新的npm依赖的步骤:
(1)React Native项目中安装依赖;
(2)Expo项目中安装依赖;
(3)Expo的metro配置中增加依赖对应的extraNodeModules项,如增加“react-navigation”后,修改为如下样子:
1 | extraNodeModules: { |
◆之后就可在demo目录下使用expo开发上一层目录的React Native工程了,运行“npm start”即可开始;
◆参考项目地址,查看git log可看到大致改造过程;
尝试真实的React Native项目
基础React Native项目尝试成功之后对于真实项目的改造也比较有信心了,按照总结的思路步骤对一个真实项目做尝试,遇到了如下几个坑:
◇Icons
(1)React Native通常使用的图标库是“react-native-vector-icons”,Expo使用的图标库是“@expo/vector-icons”,它对“react-native-vector-icons”增加了一层兼容之后的库,默认是包含在Expo中的;
(2)React Native引入图标的语法如:import MaterialIcon from "react-native-vector-icons/MaterialIcons,而Expo引入图标的语法如:import { MaterialIcons } from '@expo/vector-icons';
(3)原项目中的__import MaterialIcon from "react-native-vector-icons/MaterialIcons"语句在Expo运行环境下会被自动解析成__import MaterialIcon from "@expo/vector-icons/MaterialIcons,这在Expo中会引起报错;
(4)按照Expo引入图标的语法,将原项目的__import MaterialIcon from "react-native-vector-icons/MaterialIcons"__语句改为__import {MaterialIcons} from "react-native-vector-icons"__才能通过编译,但这样就影响了原项目的代码内容和正常编译;
(5)目前未发现Expo环境中控制自动解析的metro配置项;
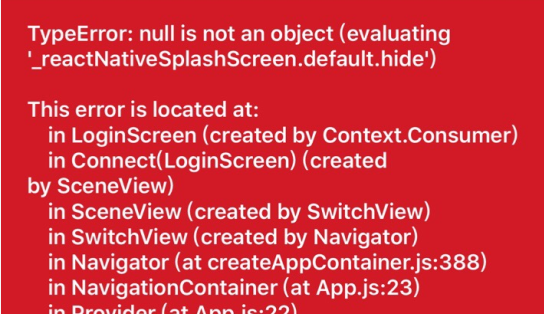
◇SplashScreen
(1)原项目中使用了“react-native-splash-screen”实现启动页,虽然使用上一步中的方法引入h和指定了“react-native-splash-screen”,但在调用SplashScreen函数时还是会报如下找不到splash库的错误;
(2)“react-native-splash-screen”官方文档指出在Android和iOS环境下分别需要执行link和增加配置才可正常工作,而在Expo环境该如何配置暂时没有找到;
(3)Expo官方文档暂未找到关于如何link lib的说明;
结论
以上,得出结论:目前在保持原React Native代码正常的前提下,为工程增加Expo开发方式支持的想法无法实现。